Making Rubble: Design and Materials
Part of my plan for my Cities of Death table for Warhammer 40K is having plenty of rubble. It adds Difficult Terrain, can occasionally block Line of Sight, creates Cover, and adds visual interest to the table. Since I don’t want to game exclusively on a table with ruins, but instead want an equal or greater number of intact buildings, I don’t want any of my buildings to have fixed rubble glued to them. They need to be added as needed.
Getting the Rubble Right: Influences
Long before making my first rubble pile, I was struck by some observations Mike made in this Terranscapes Youtube video on the Ruined City he made for a customer. His rubble looks quite believable.
The second major influence is the Pegasus Hobbies Rubble pack (which I’ll be reviewing briefly separately). Its three pieces were useful to look at and compare to as I made the various ones below. They have a very standard tabletop painting quality to them and my goal is to equal or exceed them. Their design though is excellent, even though my needs are slightly different.
My Approach to Rubble
- Modular/Removable: I need to be able to model intact buildings and ruined ones. I can’t have the rubble glued to a building.
- Realistic Presence: Most rubble scatter terrain is designed as being an irregular circular shape. From the brief research I did and just a lifetime of experience of watching movies and consuming media, it is natural for rubble to accumulate against the sides of immovable objects. Tanks with Dozer Blades would push the rubble out of the way. In photos of bombed out WWII sites, avenues have been cleared out to let vehicles and supplies through. The Grand Bazaar level in the game Battlefield 3 also meshes with my understanding of rubble smooshed up against the sides of buildings.
- Semi-Circular Design: The nice thing about two semi-circular rubble piles with roughly the same width is that they can be pushed together to create a single larger rubble pile.
- Use Rubbish: A major driving force of my creating rubble is to use up my plastic sprue and Hirst Arts miscasts. I can’t afford to chop up perfectly good Cities of Death buildings to have even more natural rubble. I have almost enough Pegasus Hobbies buildings to spare a few sections, but I would always rather keep them usable for buildings and unblemished.
Rubble Materials
For all of the rubble bases I have been making, I have used For Sale signs from Wal-Mart for $1.59 or so. They do bend, which is an issue, but they don’t warp from glue or water, and polystyrene cement bonds with them.
Sprue Rubble
The first material I turned to for my rubble piles was sprue and only sprue. After gluing down pieces of varying sizes and realizing that the look was odd, I tried to keep them all about equal in length. I didn’t fuss over trying to make them resemble actual bricks though. I think the overall effect is alright, especially at arm’s length. It doesn’t bear much scrutiny though, but certainly helps with recycling sprue. I realized I needed something to cover empty spots on the base and glued sand down to fill them out.

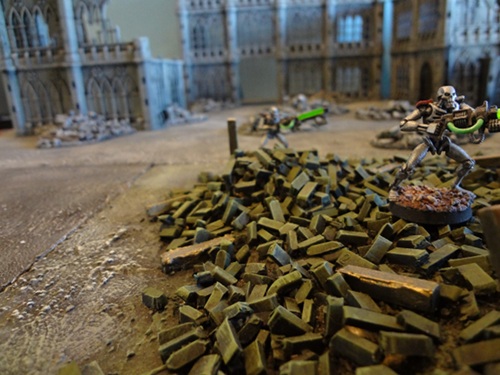
I took the idea of sprue rubble pretty far in this 1’x1′ section for my Cities of Death layout:

Cork Rubble
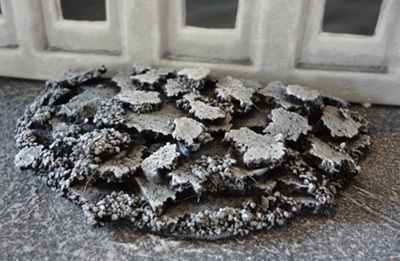
I had a ruined bulletin board, but ended up throwing it out because the cork on it was so cheap, but the idea that I could use cork for rubble lingered. I also had a roll of cork purchased years ago from a craft store. For my semi-circular designs the roll of cork has the wonderful advantage of two straight edges. I used hot glue to affix it and worked in layers, switching to tearing off pieces towards the top. I think it needs further crumbles to make it look more realistic and ultimately cork is a poor material to use.

Architecture Blocks or Modeling Blocks
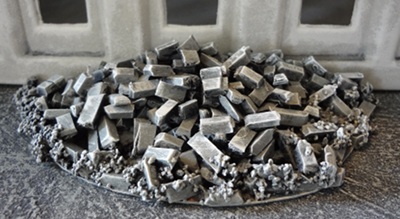
A former colleague once brought in a model building kit because he knew about my interest in gaming. It had a bag of wooden building blocks inside and a bag of shingles. I have never been tempted to use the bag until I set about creating rubble. The bricks work wonderfully. My supply of them is quite finite though, but I’ll be glad once the bag has been used up. They are near the scale used in the Hirst Arts Small Brick Mold. I also glued some round craft sticks and painted them as rusted metal.

Plaster Miscasts
When casting with Hirst Arts molds, especially earlier on, I would end up with a lot of pieces that were either too low, not having enough plaster, or which had a large piece of plaster on the top, because I had scraped the molds too late. You can sand or chip away pieces that are too large, but that’s a lot of work for a good brick or accessory. I realized recently that I could probably top off pieces that are too low, but have already saved many in a plastic bag. I also have the plaster from scraping, the plaster from the cup used to mix and pour it from, and plaster that dried on the spoon.
The look is the closest to Pegasus Hobbies’ product and is superior to the other methods. The variety of shapes in the miscasts gives just the sort of chaotic jumbled effect found in real war rubble.
Hybrid Rubble
Perhaps not surprisingly the best looking rubble comes from combining the architecture bricks with sprue and a lot of plaster miscasts. To me, these all meet or exceed my expectations for quality realistic rubble.
Conclusions
One of the things that I ignored as I went through creating my initial rubble piles was the fullness that real rubble has. There aren’t conspicuous gaps in the densest parts of rubble piles. Those areas would naturally be filled in. Both Terranscapes and Pegasus Hobbies get this aspect right. I think I will go back through on my earlier pieces and add plaster fragments to help fill in the gaps.
I also think that a small variety in coloration really adds a lot to rubble piles. I may add a few muted colors to the existing piles as well.
Moving forward on future rubble piles, I may include a few recognizable Hirst Arts pieces that are not miscasts or cut up a few panels from my Pegasus Hobbies Gothic line and strategically place them in prominent positions in the new rubble piles. I think a few IMEX Platformer pieces might also make their way into rubble.

Hey nice tutorial. Using lots of different materials helps a lot. My favorite go to materials are plaster and joint compound. Plaster is amazing. mix some up in a paper plate the right before it gets hard, crumble up the plate with the plaster on it. the result will be nice flat rubble chunks with completely random breakage edges. use your joint compound to fill in the gaps, and random brick and sprue and detritus to break thinks up and the results are quite amazing.
Pingback:Building Progress | Warhammer 39,9999