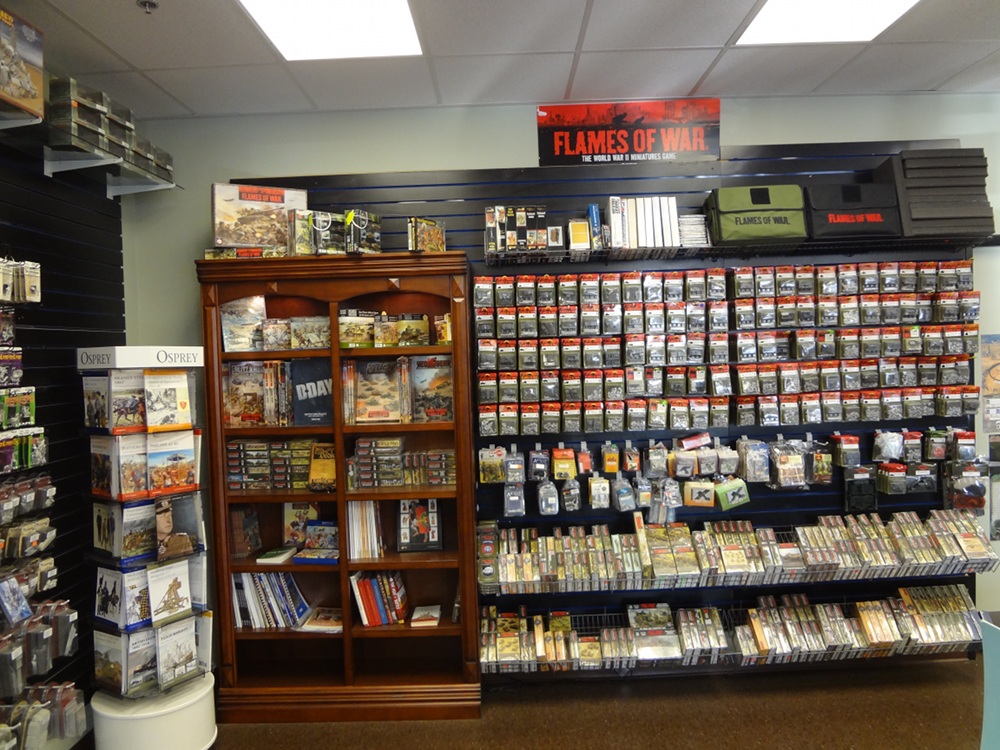
Dust Tactics Operation Cerberus
Distributed by Fantasy Flight Games and made by Dust Studio, Operation “Cerberus” is the latest expansion for Dust Tactics. While previous expansions have included two new miniatures, Operation Cerberus features a plastic 3D building as well, easily making it well worth its SRP of $44.95.
Of course, the expansion is just that: an expansion. While I got it solely to add its building to my terrain, it does include two new hero miniatures. The Allies get The Chef, a dual-flamer wielding maniac. The Axis feature the skirt-wearing, sniper rifle-wielding Angela Wolf. The expansion rulebook suggests some tactics for them, introduces further rules and units, and has scenarios involving the new building, as well as instructions on putting it together.
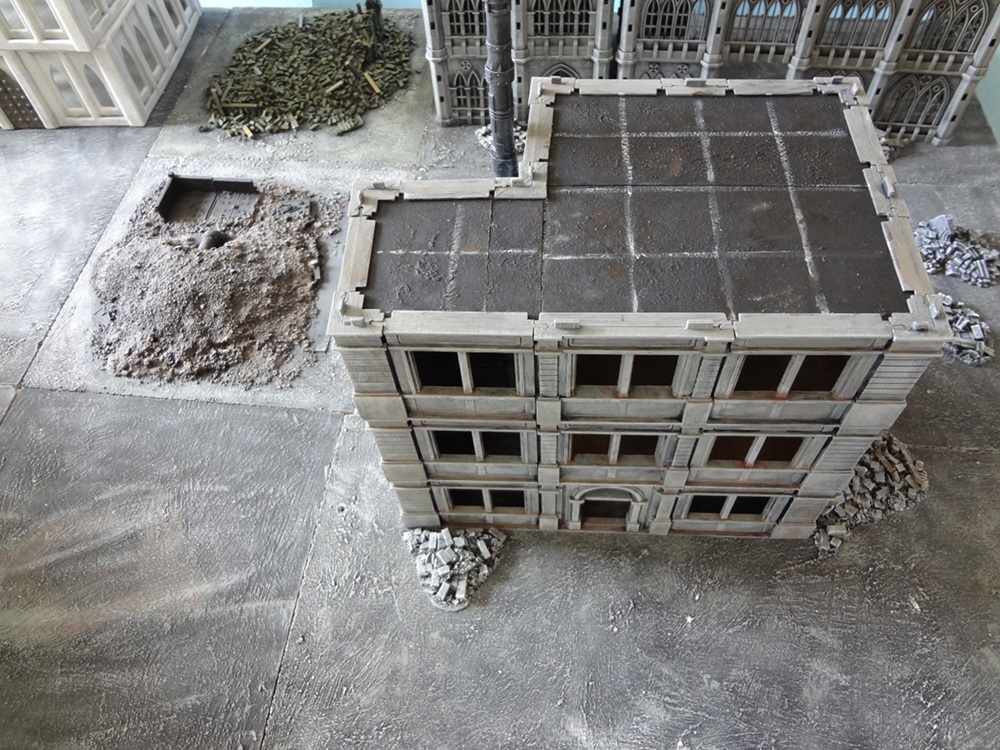
The Operation “Cerberus” Building
 Those directions are actually useful. While the pieces are intuitive, building three separate floors and then placing them together requires great dexterity and patience. Instead, upper pieces should be placed on the top tabs. The other panels slide down vertically into the waiting grooves. The pieces “lock” in at the top, leaving the lower portion freer to potentially pop out. This is more apparent in a smaller build as adding floors further stabilizes the building. The building is also designed more as a facade than for both detailed interior and exterior use. The plastic used is also lightweight and very hard, which makes it brittle and more prone to snapping than other plastics typically used in wargaming. Jerky motions can be rewarded with a connector snapping off and getting stuck in the groove.
Modularity
Modularity is restricted by the design of the corner elements as well as the linking mechanisms between pieces. 3 Inside Corners are provided, while there are 15 Outside Corners. Are they really that different? Yes! Their upper tabs and their bottom slots both differ, as well as the aesthetic difference between having inside and outside designs. The other pieces are further divided between narrow panels and wide panels. Narrow panels are 51mm wide, not including their connectors. The Wide panels are about 71mm across, again not including the connectors. The measurements get even more confusing when the set’s two Support Doors and two Support Windows are factored in. They share a 92mm width. Lastly the other connectors, including the corners, have a standard width of about 27mm. Because of all these varying measurements, I have stayed with one of the standard configurations from the book, which is used in scenarios 1-6. Otherwise, some thought or moderate experimentation is required in order to get a building that will match up. There are also no T-intersection pieces.
Visual Design
Its design is perfect, of course, for Dust Tactics, which takes place in the alternate WWII timeline of 1947. Besides fitting well into any other WWII era wargame, it also carries well into the present. Want a building to fend off zombies from? Check. Need a building to stage your own “Assault on Precinct 13”? Check. It fits in well for use as a building for Heroclix. It also bears up well in more futuristic sci-fi settings.
Adding Basswood Floors
 The building comes with card floors that insert into the grooves. Unfortunately they don’t run the entire length of the building. I knew for other wargaming use, I would want actual floors and quickly ruled out plasticard as an option as it lacks rigidity and would collapse downwards with any serious weight. I happened to have 1/16th inch basswood strips on hand from Revell, purchased at Michael’s. They slid in easily into the building’s grooves. My strips were 4x24x1/16 inches, so I next began trimming them down to size.
The dimensions I eventually arrived at were:
Long Piece A – 180mm x 92mm
Long Piece B – 180mm x 85mm
The two large pieces fill in a 2×2 area on the Operation Cerberus board. I suppose you could split the difference and have two pieces both 180mm by 88.5mm or so. There is some wiggle room allowed. Very importantly: the plastic structure can bend and bulge depending on how you cram flooring in. I know that my pieces are causing it to bulge slightly.
I roofed the asymmetrical portion that extends off, which I would call a 1×1, with two separate pieces of basswood, because I had run out of a large enough piece. Together they measure: 91mm x 85mm.
A more precise hobbyist will get more accurate numbers, but the dimensions I used were enough to have a sufficiently convincing roof that is relatively easy to remove and reattach.
Painting the Tarred Roof
While basswood has some slight texture, I saw that I would want more and used Spray Adhesive on the uppermost roof pieces. I then poured dental plaster over them, briefly shook them off after a small wait, hit them again with the Spray Adhesive, and did a final layer of plaster. I avoided PVA glue because it is usually too thick and I didn’t want to warp the basswood strips. A simple black coat of craft paint later, I had a passable tarred roof reminiscent of asphalt. The lines were added with a sloppy drybrush of light grey paint. Then I sprayed them with Testor’s Glosscote. Despite the gloss finish, they are relatively flat.
The other floors did not receive as much attention with two colors painted on, followed by a light grey drybrush. Depending on how you are going to use your building, you may want more additional roof areas which would be as easy as preparing other basswood strips.